Configure an auth provider
Auth providers are configured through the NetFoundry Frontdoor REST API. Each auth provider defines how users authenticate with external identity providers before accessing your shares.
Steps
- Frontdoor console
- Command-line interface
-
From the Frontdoor console, click Authentication in the left-hand menu.
-
Click the + icon to create a new auth provider.
-
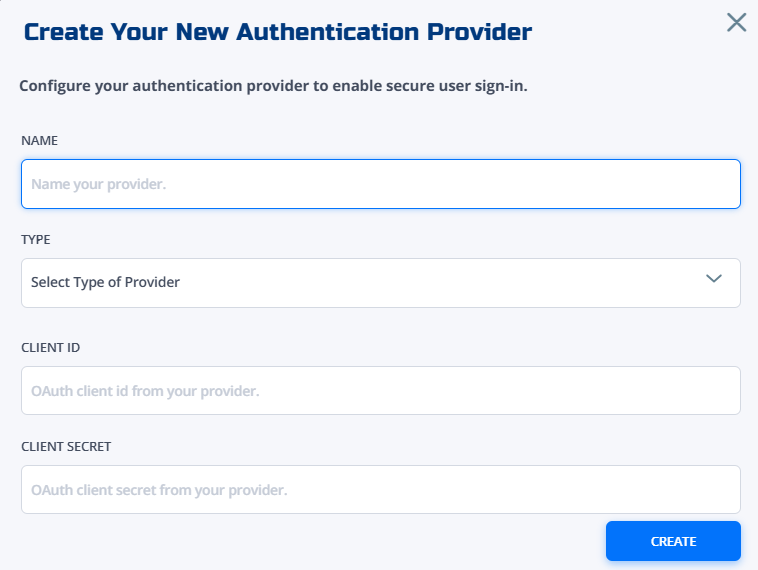
Fill in the auth provider fields:
- Name: Enter a name for the auth provider.
- Type: Select the type of auth provider you want to create (OIDC, GITHUB, or GOOGLE).
- Client ID: Enter the client ID obtained from your identity provider.
- Client secret: Enter the client secret obtained from your identity provider.
-
Click Create.
Your auth provider is created and can be selected when creating an OAuth-protected share.
Use the REST API to create an auth provider for Frontdoor. Choose from one of the 3 supported provider types and make sure to replace placeholders with your actual values:
OIDC
curl -X POST "https://api.netfoundry.io/frontdoor/{frontdoorId}/auth-providers" \
  -H "Content-Type: application/json" \
  -H "Authorization: Bearer <your-api-token>" \
  -d '{
    "name": "oidc-auth",
    "type": "OIDC",
    "config": {
      "client_id": "<oidc-client-id>",
      "client_secret": "<oidc-client-secret>"
      "scopes": ["openid", "email", "profile"],
      "issuer": "https://your-oidc-provider.com"
    }
  }'
GITHUB
curl -X POST "https://api.netfoundry.io/frontdoor/{frontdoorId}/auth-providers" \
  -H "Content-Type: application/json" \
  -H "Authorization: Bearer <your-api-token>" \
  -d '{
    "name": "github-auth",
    "type": "GITHUB",
    "config": {
      "client_id": "<github-client-id>",
      "client_secret": "<github-client-secret>"
    }
  }'
GOOGLE
curl -X POST "https://api.netfoundry.io/frontdoor/{frontdoorId}/auth-providers" \
  -H "Content-Type: application/json" \
  -H "Authorization: Bearer <your-api-token>" \
  -d '{
    "name": "google-auth",
    "type": "GOOGLE",
    "config": {
      "client_id": "<google-client-id>",
      "client_secret": "<google-client-secret>"
    }
  }'
See the auth provider API guide for more details.
Supported provider types
NetFoundry Frontdoor supports three types of OAuth providers:
OIDC: Standard OpenID Connect provider for custom identity providersGITHUB: GitHub OAuth authenticationGOOGLE: Google OAuth authentication
Configuration parameters by provider type
Each provider type requires specific configuration parameters:
OIDC (OpenID Connect)
client_id: OIDC client ID from your identity providerclient_secret: OIDC client secret from your identity providerissuer_url: The issuer URL for your OIDC providerscopes: Array of OAuth scopes to request (e.g.,["openid", "email", "profile"])
Google OAuth
client_id: Google OAuth client ID from Google Cloud Consoleclient_secret: Google OAuth client secret from Google Cloud Console
GitHub OAuth
client_id**: GitHub OAuth app client IDclient_secret: GitHub OAuth app client secret
Next steps
After creating an auth provider, you can use it to create an OAuth-protected share.